딥러닝(Deep Learning) 학회에 논문을 제출한 뒤에, 리뷰(Review) 평가 분석 및 Rebuttal 쓰는 방법
[Review 양식]
논문이 학회나 저널에 제출되면, 리뷰 과정을 거쳐 해당 논문을 수락할 것인지 아닌지 결정한다. 일반적인 리뷰(review) 양식은 다음과 같은 구조를 따른다.
1. 요약(Summary): 해당 논문의 내용을 요약하여 작성한다.
2. 참신성(Novelty): 해당 논문이 제안한 메서드, 시스템, 혹은 애플리케이션이 참신한지 작성한다.
3. 평가(Evaluation): 논문에서 제안한 방법이 이론적으로 혹은 실험적으로 잘 검증되었는지 작성한다.
4. 결과의 유의미함(Significance): 논문에서의 결과가 중요한(significant) 결과인지 작성한다.
5. 강점(Strengths): 논문의 강점을 작성한다. "논문이 잘 작성되었고, 아이디어가 참신하다.", "본 논문의 메서드는 어떠한 부분에서 효율성이 높다."와 같은 내용이 많이 들어간다.
6. 약점(Weaknesses): 논문의 문제점 및 약점을 작성한다. "어떠한 부분에서 실험이 부족하다.", "이론적인 검증이 부족하다.", "기존에 제안되었던 방법과 유사하다."와 같은 내용이 들어갈 수 있다.
7. 점수(Rating): 논문에 점수를 매긴다. 일반적으로 "Strong Accept", "Weak Accept", "Borderline", "Weak Reject", "Strong Reject"으로 점수를 매긴다.
8. 자신감(Confidence): 논문을 읽고 있는 리뷰어의 해당 분야의 자신감을 의미한다. 자신이 이 분야의 전문가라면 높은 자신감 값을 부여한다.
많은 학회에서는 rebuttal 과정을 포함한다. rebuttal은 "반박"의 의미를 가지고 있다. 쉽게 말해 리뷰어가 논문을 잘못 읽고 판단한 경우가 있다면, 이 부분에 대하여 바로 잡고자 노력하는 것이다. 또한 리뷰어가 잘못된 주장을 한다고 판단이 되면, 정중하게 이에 대하여 반박한다. rebuttal 과정에서는, 기본적으로 리뷰어가 작성한 내용을 놓치지 않고 최대한 간결하고 명확하게 작성하도록 권장된다.
또한 전체 리뷰 과정은 더블 블라인드(double blind)로 진행되는 경우가 많다. 리뷰를 할당하는 과정에서는 Program Chair (PC) → Area Chair (AC) → Reviewer 순으로 논문을 할당하는 경우가 많다. 이후에 저자(author)로부터 rebuttal이 도착하면, 그 결과를 수합하여 최종적으로 논문을 수락할 것인지 거절할 것인지 결정한다.
[학회 구성원의 역할]
▶ AC(Area Chair): Area Chair는 실질적으로 학회 프로그램을 curating 하는 데에 중요한 역할을 수행한다. 학회마다 다르지만, 대개 20개 이상의 논문에 대하여 review process가 순조롭게 진행될 수 있도록 한다. 일반적으로 해당 분야 학회에서 인정을 받으며 많은 논문을 쓰고 있는 교수님들이 AC 역할을 받는 경우가 많다. 학회에 따라서 역할이 조금씩 다를 수 있는데, 일반적으로 논문에 리뷰어를 할당하고, review와 rebuttal을 모두 읽고, 결과를 통합한다. 이후에 리뷰어(reviewer)들이 성실하게 참여했는지 확인하기 위해, 그들이 작성한 리뷰에 대해서 평가하기도 한다.
▶ 리뷰어(Reviewer): 일반적으로 4~6개 정도의 논문을 할당받아 검토한다. 논문을 읽고 나서 논문의 내용 및 장단점을 분석하고, 논문에 대한 점수(score)를 매긴다. 논문을 충분히 읽고 나서, 건설적인 언어로 저자에게 명확한 요청을 해야 한다.
[Rebuttal 작성 팁]
개인적으로 많은 도움이 되었던 글은 Devi Parikh의 "How We Write Rebuttals"이다.
▶ 원문 보기: https://deviparikh.medium.com/how-we-write-rebuttals-dc84742fece1
How we write rebuttals
By Devi Parikh, Dhruv Batra, Stefan Lee
deviparikh.medium.com
본 글에서는 CVPR, ECCV, ICCV, NeurIPS, ICLR, EMNLP와 같은 AI 학회에 적합한 rebuttal 방법을 제안한다. 일반적으로 논문을 submit하면, 해당 논문에 대한 리뷰(review)가 도착하고, rebuttal 기회가 생긴다. 일반적으로 리뷰어(reviewer)와 area chair가 rebuttal을 받는 대상이며, 최대한 간결하고 이해하기 쉽게 작성해야 한다.
또한 에세이 리뷰(Essay Review) 사이트에서 제공하는 "학술 논문 영작 및 저널 커버레터/반박레터 샘플 및 표현 모음" 글도 한 번쯤 읽어 보면 좋다. 개인적으로 처음 논문을 쓸 때 도움이 될 법한 내용이 포함되어 있다고 생각한다.
마지막으로 "효과적인 반박 레터(rebuttal letter)로 논문 투고 성공하기" 글도 참고하면 좋다. 기본적인 지양 사항이나, 사용하기에 좋은 영어 표현들이 포함되어 있다.
특히나 많은 사람들이 이야기 하기를, 리뷰 앞 부분에서 긍정적인(positive) 멘트와 함께 시작하는 것이 좋다고 한다. 예를 들어 다음과 같은 멘트를 사용할 수 있다.
Dear reviewers,
We appreciate the thoughtful feedback of reviewers.
[Rebuttal 매뉴얼 예시]
아래 매뉴얼은 ACM 학회(Conference) 중 하나에서 제공하는 rebuttal 매뉴얼이다. 기본적으로 최대 5,000자까지 작성할 수 있으며, 오직 텍스트(text)로만 작성할 수 있다. 이때 외부 링크를 포함할 수 없게 되어 있다. 또한 블라인드 리뷰라는 점에서 rebuttal에서도 익명성(anonymity)을 유지할 필요가 있다.
▶ [Rebuttal] Please keep in mind the following during this rebuttal process:

* The word limit for the rebuttal is 5000 characters, in plain text.
* The response must focus on any factual errors in the reviews and any questions posed by the reviewers. It must not provide new research results or reformulate the presentation. Evaluation of your paper will be based only on the version of the paper that you have submitted. Try to be as concise and to the point as possible in your rebuttal.
* You may not place links to documents on the Internet as part of the 5000 characters to get around the word limit.
* The review response period is an opportunity to react to the reviews, but not a requirement to do so. Thus, if you feel the reviews are accurate and the reviewers have not asked any questions, then you do not have to respond.
* The reviews are as submitted by the PC members, without any coordination between them. Thus, there may be inconsistencies. Furthermore, these are not the final versions of the reviews. The reviews can later be updated to take into account the discussions at the program committee meeting, and we may find it necessary to solicit other outside reviews after the review response period.
* The program committee will read your responses carefully and take this information into account during the discussions. On the other hand, the program committee will not directly respond to your responses, either before the program committee meeting or in the final versions of the reviews. If you have any confidential comments about the reviews you received, you may choose to leave your comments in the textbox “confidential comments to ACs/PCs.”
* Your response will be seen by all PC members who have access to the discussion of your paper, so please try to be polite and constructive.
* You must continue to maintain your anonymity in the rebuttal.
또한 리뷰어(reviewer)에게는 도착하지 않으며, Area Chair (AC)에게만 전달하고 싶은 메시지가 있다면, 따로 비밀 코멘트(confidential comment)를 남길 수 있는 영역이 존재하는 경우가 있다. 그리고 필자가 경험했던 학회에 한해서는, rebuttal 기간 동안에는 CMT와 같은 사이트에서 rebuttal 내용을 최종 제출 기한 전까지는 수정이 가능했다. 따라서 일단 rebuttal 기간에는 최대한 빠르게 핵심적인 내용 위주로 rebuttal을 작성하고, 기간 동안 계속 수정하면 좋다.
'기타' 카테고리의 다른 글
Python 코드를 활용하여 동전 던지기로 주사위 굴리기와 같은 결과 만들기(Rejection Sampling과 확률론)
Rejection Sampling은 특정한 확률 분포에서 데이터를 샘플링하기 위해(표본을 뽑기 위해) 효과적으로 사용할 수 있는 알고리즘 중 하나다. 단, Rejection Sampling을 하기 위해서는 특정한 확률 분포의 확률 밀도 함수(PDF)를 알고 있어야 한다. 예를 들어 우리가 주사위를 굴린다고 하면, 각 경우에 대하여 확률이 다음과 같이 구성된다는 것을 알 수 있다.
1) 눈금 1이 나올 확률 = 1/6
2) 눈금 2가 나올 확률 = 1/6
3) 눈금 3이 나올 확률 = 1/6
4) 눈금 4가 나올 확률 = 1/6
5) 눈금 5가 나올 확률 = 1/6
6) 눈금 6이 나올 확률 = 1/6
하지만 우리가 "주사위"를 갖고 있지 않아서, 확률 분포에서 샘플링(sampling)을 진행할 수 없는 상황이라고 가정해보자. 반면에 우리에게 주사위 대신 "동전"이 있다고 해보자. 우리가 동전을 던지면, 각 경우에 대하여 확률이 다음과 같이 구성된다.
1) 앞면이 나올 확률 = 1/2
2) 뒷면이 나올 확률 = 1/2
이때 "동전"을 가지고 "주사위"를 던지는 것과 동일한 시행을 할 수 있을까? 즉, 우리는 확률 분포 p(주사위 굴리기)에서는 샘플링을 수행할 수 없고, 확률 분포 q(동전 던지기)에서는 직접적으로 샘플링을 수행할 수 있는 상황이다. 이때 사용할 수 있는 것이 바로 Rejection Sampling이다. Rejection Sampling을 이용한 방식은 다음과 같다.
1. 동전을 세 번 던져서 [0, 7] 사이의 값을 만든다.
1) 만약 값이 6 혹은 7이라면, reject하고 다시 sampling한다.
2) 만약 값이 [0, 5] 사이의 값이라면 거기에 1을 더해 반환하면 된다.
이를 코드로 옮긴 것은 다음과 같다. 동전 던지기를 수행하는 coin() 메서드를 이용해, 결과적으로 100번의 주사위 굴리기를 수행하여 결과를 출력한다.
import random


def coin():
    return random.randint(0, 1)


def three():
    out = coin()
    out = out * 2 + coin()
    out = out * 2 + coin()
    return out


def dice():
    res = three()
    while res >= 6:
        res = three()
    return res + 1


for i in range(100):
print('Dice:', dice())'기타' 카테고리의 다른 글
연구자를 위한, Google Scholar에 회원가입(프로필 등록)하는 방법
학술 대회나 학술지에 논문을 투고하기 전에 Google Scholar 계정을 요구하는 경우가 있다. 필자는 아직까지 Google Scholar 계정이 없는 상태였는데, 이번에 한 컨퍼런스에 논문을 투고하는 김에 Google Scholar에 Google Scholar에 회원가입을 진행하는 방법은 간단하다. 아래의 Google Scholar 프로필 페이지에 방문한다.
▶ Google Scholar 프로필: https://scholar.google.com/citations
Google 학술검색 서지정보
하나의 계정으로 모든 Google 서비스를 Google 학술검색 서지정보로 이동하려면 로그인하세요.
accounts.google.com
프로필 페이지에 방문한 뒤에 다음과 같이 이름, 소속(학교나 연구실), 이메일, 관심 분야를 입력하면 된다. 필자 또한 필자의 프로필 정보를 입력했다.

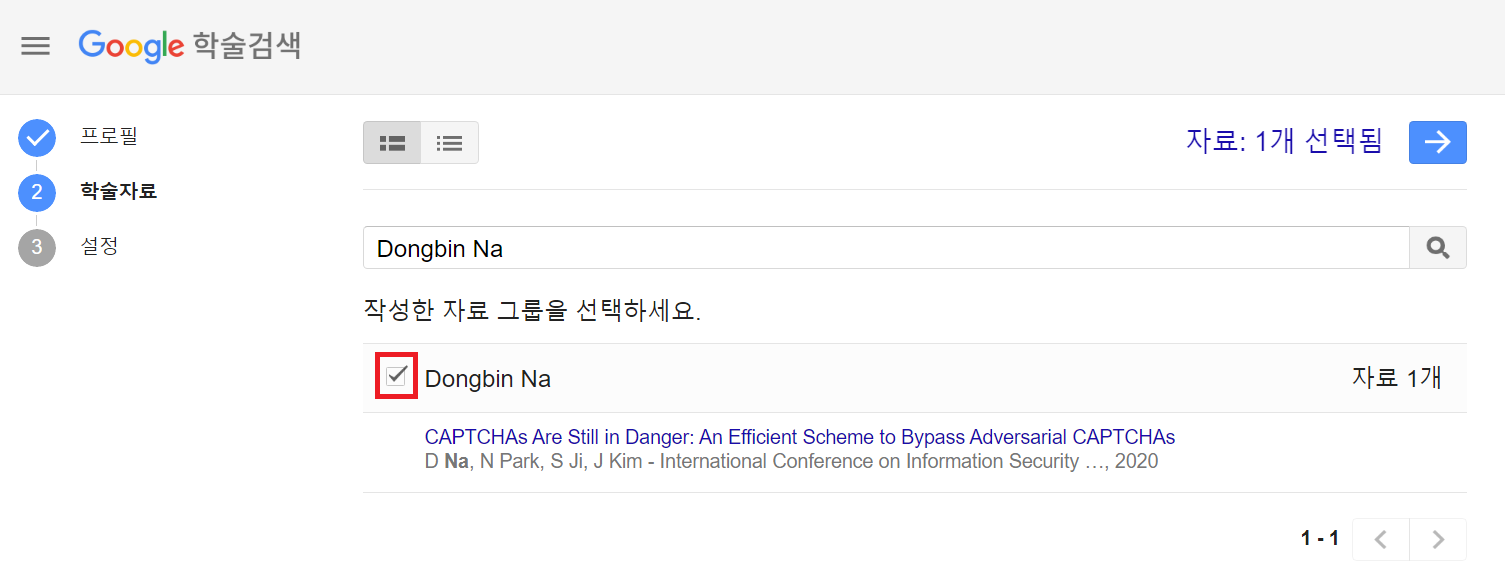
이후에 [학술자료]를 선택하는 페이지가 등장한다. 기존에 저술한 논문이 있으면, 다음과 같이 자동으로 검색되어 노출된다.
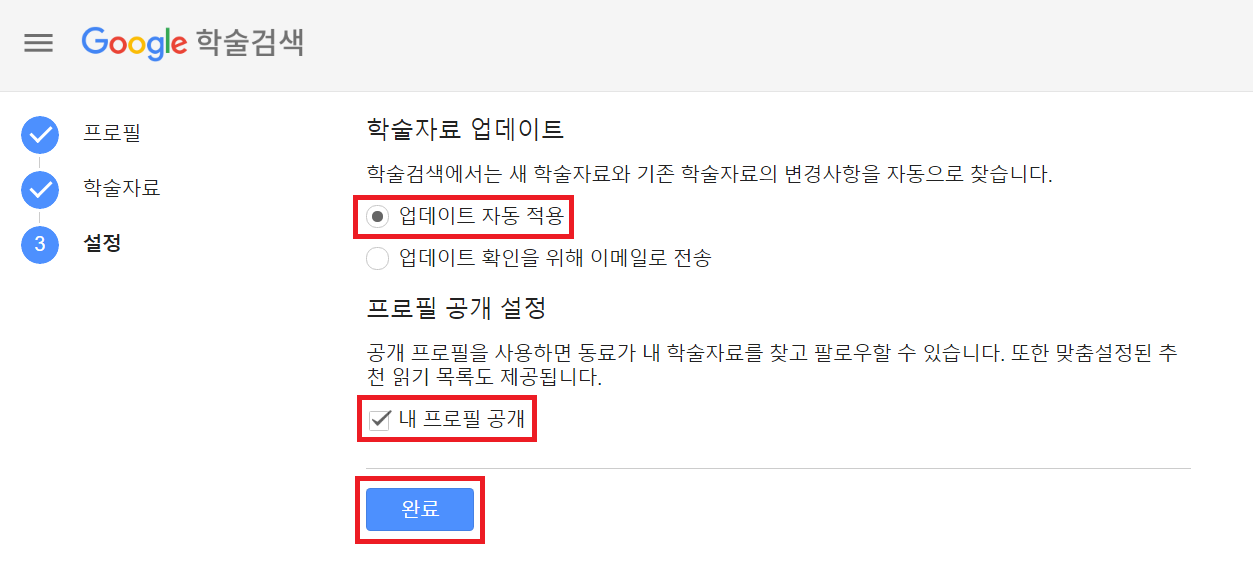
이후에 다음과 같이 [설정] 페이지에서는 기본 설정을 진행할 수 있다. 필자는 학술자료 [업데이트 자동 적용] 버튼을 눌렀다.
이후에 다음과 같이 인증 메일이 도착하는데 [이메일 주소 확인] 버튼을 누른다.

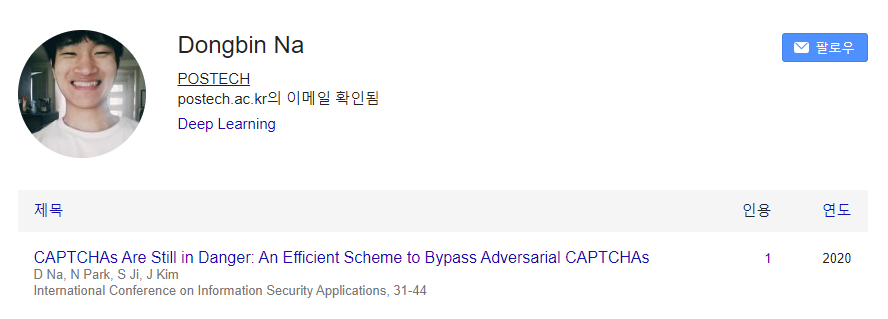
이후에 프로필 사진을 등록하면 다음과 같이 Google Scholar 프로필 설정이 완료된다.
'기타' 카테고리의 다른 글
fvcore를 이용해 NumPy 형식의 이미지를 Random Transformation하는 방법 (RandomRotation, RandomFlip, RandomContrast, RandomBrightness, RandomSaturation 등)
FAIR (Facebook AI Research) 팀에서 만든 fvcore를 이용하여 NumPy 형식의 이미지를 변형(transformation)할 수 있다. 다음과 같이 fvcore를 설치할 수 있으며, 사용 방법 또한 매우 간단하다.
!pip install fvcore
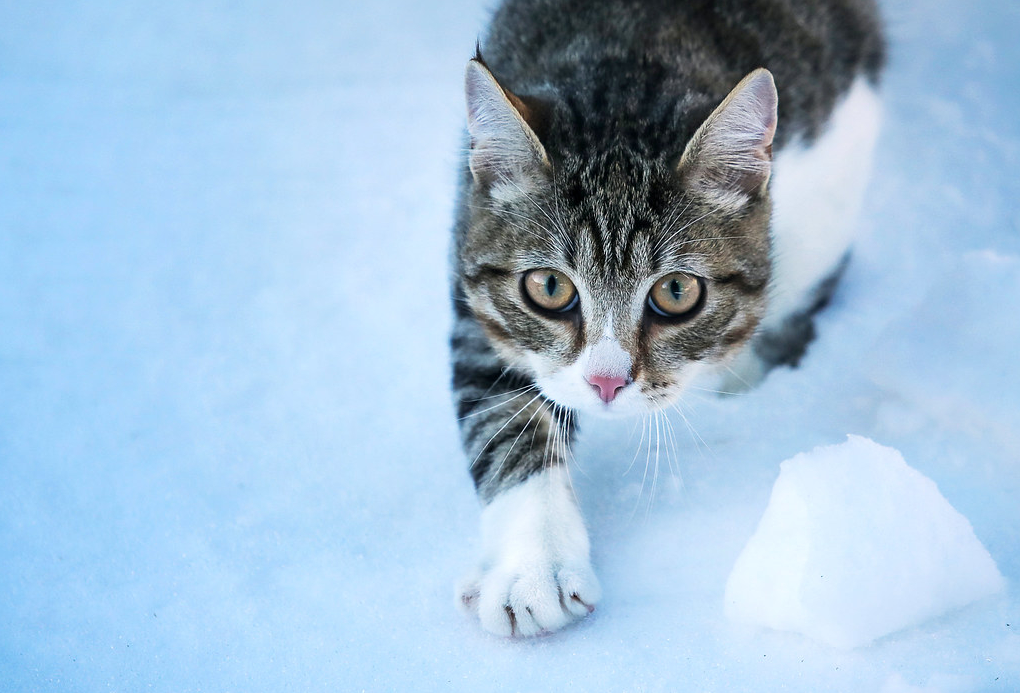
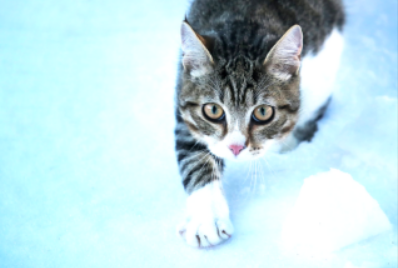
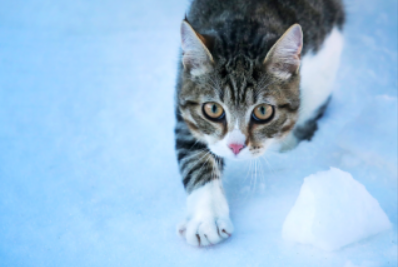
실습을 위해 간단히 한 장의 고양이 이미지를 준비해 보자. 필자는 상업적으로 사용이 가능한 무료 이미지를 준비해 보았다.
!curl https://visualhunt.com/photos/16/cat.jpg -o cat.jpg
import cv2

np_image = cv2.imread('cat.jpg')
print(np_image.shape)
실행 결과를 확인해 보면 (696, 1024, 3)이라는 값이 이미지 해상도로 출력된다. 이후에 필요한 라이브러리를 불러와 보자. 기본적으로 랜덤 변형(Random Transformation)은 다음과 같이 fvcore의 다양한 Transform 함수를 활용한다. 그래서 일단 필요한 라이브러리를 모두 불러올 수 있도록 하자.
import numpy as np
import matplotlib.pyplot as plt

from fvcore.transforms.transform import (
    BlendTransform,
    CropTransform,
    HFlipTransform,
    NoOpTransform,
    PadTransform,
    Transform,
    TransformList,
    VFlipTransform,
)
1. Random Contrast
랜덤으로 대비(contrast)를 변경할 수 있다. 파라미터로 intensity_min과 intensity_max를 넣을 수 있는데, 값이 1일 때는 변화를 주지 않겠다는 것이다. 필자의 경우 [0.8, 1.2] 정도의 옵션으로 많이 사용했다.
class RandomContrast():
    """
    Randomly transforms image contrast.
    Contrast intensity is uniformly sampled in (intensity_min, intensity_max).
    - intensity < 1 will reduce contrast
    - intensity = 1 will preserve the input image
    - intensity > 1 will increase contrast
    See: https://pillow.readthedocs.io/en/3.0.x/reference/ImageEnhance.html
    """

    def __init__(self, intensity_min, intensity_max):
        """
        Args:
            intensity_min (float): Minimum augmentation
            intensity_max (float): Maximum augmentation
        """
        self.intensity_min = intensity_min
        self.intensity_max = intensity_max

    def get_transform(self, image):
        w = np.random.uniform(self.intensity_min, self.intensity_max)
        return BlendTransform(src_image=image.mean(), src_weight=1 - w, dst_weight=w)
RandomContrast는 다음과 같이 사용하면 된다.
random_contrast = RandomContrast(intensity_min=0.8, intensity_max=1.2)
transform = random_contrast.get_transform(np_image)
print(transform)
plt.imshow(transform.apply_image(np_image)[...,[2,1,0]])
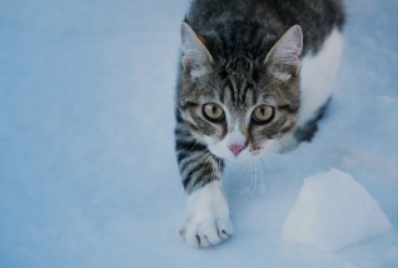
대비 값이 1.2일 때(intensity_min=1.2, intensity_max=1.2)는 다음과 같다.

대비 값이 0.8일 때intensity_min=0.8, intensity_max=0.8)는 다음과 같다.

2. Random Brightness
랜덤으로 명도(brightness)를 변경할 수 있다. 파라미터로 intensity_min과 intensity_max를 넣을 수 있는데, 값이 1일 때는 변화를 주지 않겠다는 것이다. 필자의 경우 [0.8, 1.2] 정도의 옵션으로 많이 사용했다.
class RandomBrightness():
    """
    Randomly transforms image brightness.
    Brightness intensity is uniformly sampled in (intensity_min, intensity_max).
    - intensity < 1 will reduce brightness
    - intensity = 1 will preserve the input image
    - intensity > 1 will increase brightness
    See: https://pillow.readthedocs.io/en/3.0.x/reference/ImageEnhance.html
    """

    def __init__(self, intensity_min, intensity_max):
        """
        Args:
            intensity_min (float): Minimum augmentation
            intensity_max (float): Maximum augmentation
        """
        self.intensity_min = intensity_min
        self.intensity_max = intensity_max

    def get_transform(self, image):
        w = np.random.uniform(self.intensity_min, self.intensity_max)
        return BlendTransform(src_image=0, src_weight=1 - w, dst_weight=w)
RandomBrightness는 다음과 같이 사용하면 된다.
random_brightness = RandomBrightness(intensity_min=0.8, intensity_max=1.2)
transform = random_brightness.get_transform(np_image)
print(transform)
plt.imshow(transform.apply_image(np_image)[...,[2,1,0]])
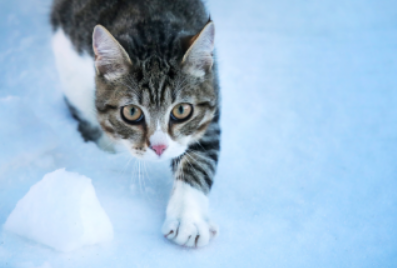
명도 값이 1.2일 때(intensity_min=1.2, intensity_max=1.2)는 다음과 같다.
명도 값이 0.8일 때(intensity_min=0.8, intensity_max=0.8)는 다음과 같다.
3. Random Flip
랜덤으로 뒤집기(flip)를 수행할 수 있다. 아래 코드의 경우 기본 설정(default setting)상 horizontal flip만을 사용한다. 일반적으로 computer vision에서 사물을 분류(classification)하는 작업(task)의 경우 vertical flip으로 인해 오히려 성능이 떨어지는 경우도 있는 반면에, horizontal flip은 대체로 성능상의 향상을 이끌어 낸다는 특징이 있다. 또한 prob는 flip을 수행할 확률에 해당한다.
class RandomFlip():
    """
    Flip the image horizontally or vertically with the given probability.
    """

    def __init__(self, prob=0.5, *, horizontal=True, vertical=False):
        """
        Args:
            prob (float): probability of flip.
            horizontal (boolean): whether to apply horizontal flipping
            vertical (boolean): whether to apply vertical flipping
        """
        if horizontal and vertical:
            raise ValueError("Cannot do both horiz and vert. Please use two Flip instead.")
        if not horizontal and not vertical:
            raise ValueError("At least one of horiz or vert has to be True!")

        self.prob = prob
        self.horizontal = horizontal
        self.vertical = vertical

    def _rand_range(self, low=1.0, high=None, size=None):
        """
        Uniform float random number between low and high.
        """
        if high is None:
            low, high = 0, low
        if size is None:
            size = []
        return np.random.uniform(low, high, size)

    def get_transform(self, image):
        h, w = image.shape[:2]
        do = self._rand_range() < self.prob
        if do:
            if self.horizontal:
                return HFlipTransform(w)
            elif self.vertical:
                return VFlipTransform(h)
        else:
            return NoOpTransform()
다음과 같이 사용하면 된다.
random_flip = RandomFlip(prob=0.5, horizontal=True, vertical=False)
transform = random_flip.get_transform(np_image)
print(transform)
plt.imshow(transform.apply_image(np_image)[...,[2,1,0]])
좌우 반전(horizontal flip) 결과는 다음과 같다. (prob=1.0, horizontal=True, vertical=False)
상하 반전(vertical flip) 결과는 다음과 같다. (prob=1.0, horizontal=False, vertical=True)

4. Random Saturation
랜덤으로 채도(saturation)를 변경할 수 있다. 파라미터로 intensity_min과 intensity_max를 넣을 수 있는데, 값이 1일 때는 변화를 주지 않겠다는 것이다. 필자의 경우 [0.8, 1.2] 정도의 옵션으로 많이 사용했다.
class RandomSaturation():
    """
    Randomly transforms saturation of an RGB image.
    Input images are assumed to have 'RGB' channel order.
    Saturation intensity is uniformly sampled in (intensity_min, intensity_max).
    - intensity < 1 will reduce saturation (make the image more grayscale)
    - intensity = 1 will preserve the input image
    - intensity > 1 will increase saturation
    See: https://pillow.readthedocs.io/en/3.0.x/reference/ImageEnhance.html
    """

    def __init__(self, intensity_min, intensity_max):
        """
        Args:
            intensity_min (float): Minimum augmentation (1 preserves input).
            intensity_max (float): Maximum augmentation (1 preserves input).
        """
        self.intensity_min = intensity_min
        self.intensity_max = intensity_max

    def get_transform(self, image):
        assert image.shape[-1] == 3, "RandomSaturation only works on RGB images"
        w = np.random.uniform(self.intensity_min, self.intensity_max)
        grayscale = image.dot([0.299, 0.587, 0.114])[:, :, np.newaxis]
        return BlendTransform(src_image=grayscale, src_weight=1 - w, dst_weight=w)
다음과 같이 사용하면 된다.
random_saturation = RandomSaturation(intensity_min=0.8, intensity_max=1.2)
transform = random_saturation.get_transform(np_image)
print(transform)
plt.imshow(transform.apply_image(np_image)[...,[2,1,0]])
채도 값이 0.8일 때(intensity_min=0.8, intensity_max=0.8)는 다음과 같다.
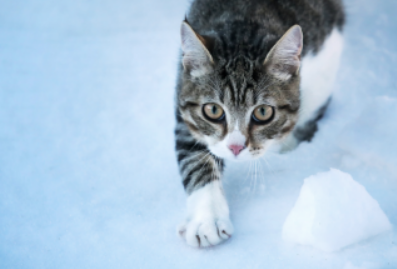
채도 값이 1.2일 때(intensity_min=1.2, intensity_max=1.2)는 다음과 같다.
5. Random Rotation
랜덤으로 회전(rotation)을 수행할 수 있다. angle 변수에 (min, max) 값을 넣어 회전을 수행할 수 있다. 필자의 경우 (-10, 10) 정도의 옵션으로 많이 사용했다.
class RotationTransform(Transform):
    """
    This method returns a copy of this image, rotated the given
    number of degrees counter clockwise around its center.
    """

    def __init__(self, h, w, angle, expand=True, center=None, interp=None):
        """
        Args:
            h, w (int): original image size
            angle (float): degrees for rotation
            expand (bool): choose if the image should be resized to fit the whole
                rotated image (default), or simply cropped
            center (tuple (width, height)): coordinates of the rotation center
                if left to None, the center will be fit to the center of each image
                center has no effect if expand=True because it only affects shifting
            interp: cv2 interpolation method, default cv2.INTER_LINEAR
        """
        super().__init__()
        image_center = np.array((w / 2, h / 2))
        if center is None:
            center = image_center
        if interp is None:
            interp = cv2.INTER_LINEAR
        abs_cos, abs_sin = (abs(np.cos(np.deg2rad(angle))), abs(np.sin(np.deg2rad(angle))))
        if expand:
            # find the new width and height bounds
            bound_w, bound_h = np.rint(
                [h * abs_sin + w * abs_cos, h * abs_cos + w * abs_sin]
            ).astype(int)
        else:
            bound_w, bound_h = w, h

        self._set_attributes(locals())
        self.rm_coords = self.create_rotation_matrix()
        # Needed because of this problem https://github.com/opencv/opencv/issues/11784
        self.rm_image = self.create_rotation_matrix(offset=-0.5)

    def apply_image(self, img, interp=None):
        """
        img should be a numpy array, formatted as Height * Width * Nchannels
        """
        if len(img) == 0 or self.angle % 360 == 0:
            return img
        assert img.shape[:2] == (self.h, self.w)
        interp = interp if interp is not None else self.interp
        return cv2.warpAffine(img, self.rm_image, (self.bound_w, self.bound_h), flags=interp)

    def apply_coords(self, coords):
        """
        coords should be a N * 2 array-like, containing N couples of (x, y) points
        """
        coords = np.asarray(coords, dtype=float)
        if len(coords) == 0 or self.angle % 360 == 0:
            return coords
        return cv2.transform(coords[:, np.newaxis, :], self.rm_coords)[:, 0, :]

    def apply_segmentation(self, segmentation):
        segmentation = self.apply_image(segmentation, interp=cv2.INTER_NEAREST)
        return segmentation

    def create_rotation_matrix(self, offset=0):
        center = (self.center[0] + offset, self.center[1] + offset)
        rm = cv2.getRotationMatrix2D(tuple(center), self.angle, 1)
        if self.expand:
            # Find the coordinates of the center of rotation in the new image
            # The only point for which we know the future coordinates is the center of the image
            rot_im_center = cv2.transform(self.image_center[None, None, :] + offset, rm)[0, 0, :]
            new_center = np.array([self.bound_w / 2, self.bound_h / 2]) + offset - rot_im_center
            # shift the rotation center to the new coordinates
            rm[:, 2] += new_center
        return rm

    def inverse(self):
        """
        The inverse is to rotate it back with expand, and crop to get the original shape.
        """
        if not self.expand:  # Not possible to inverse if a part of the image is lost
            raise NotImplementedError()
        rotation = RotationTransform(
            self.bound_h, self.bound_w, -self.angle, True, None, self.interp
        )
        crop = CropTransform(
            (rotation.bound_w - self.w) // 2, (rotation.bound_h - self.h) // 2, self.w, self.h
        )
        return TransformList([rotation, crop])


class RandomRotation():
    """
    This method returns a copy of this image, rotated the given
    number of degrees counter clockwise around the given center.
    """

    def __init__(self, angle, expand=True, center=None, sample_style="range", interp=None):
        """
        Args:
            angle (list[float]): If ``sample_style=="range"``,
                a [min, max] interval from which to sample the angle (in degrees).
                If ``sample_style=="choice"``, a list of angles to sample from
            expand (bool): choose if the image should be resized to fit the whole
                rotated image (default), or simply cropped
            center (list[[float, float]]):  If ``sample_style=="range"``,
                a [[minx, miny], [maxx, maxy]] relative interval from which to sample the center,
                [0, 0] being the top left of the image and [1, 1] the bottom right.
                If ``sample_style=="choice"``, a list of centers to sample from
                Default: None, which means that the center of rotation is the center of the image
                center has no effect if expand=True because it only affects shifting
        """
        super().__init__()
        assert sample_style in ["range", "choice"], sample_style
        self.is_range = sample_style == "range"
        if isinstance(angle, (float, int)):
            angle = (angle, angle)
        if center is not None and isinstance(center[0], (float, int)):
            center = (center, center)
        self.angle = angle
        self.expand = expand
        self.center = center
        self.sample_style = sample_style
        self.interp = interp

    def get_transform(self, image):
        h, w = image.shape[:2]
        center = None
        if self.is_range:
            angle = np.random.uniform(self.angle[0], self.angle[1])
            if self.center is not None:
                center = (
                    np.random.uniform(self.center[0][0], self.center[1][0]),
                    np.random.uniform(self.center[0][1], self.center[1][1]),
                )
        else:
            angle = np.random.choice(self.angle)
            if self.center is not None:
                center = np.random.choice(self.center)

        if center is not None:
            center = (w * center[0], h * center[1])  # Convert to absolute coordinates

        if angle % 360 == 0:
            return NoOpTransform()

        return RotationTransform(h, w, angle, expand=self.expand, center=center, interp=self.interp)
다음과 같이 사용하면 된다. 만약에 expand를 사용하고 싶지 않다면 expand의 값을 False로 넣으면 된다.
random_rotation = RandomRotation(angle=(10, 10))
transform = random_rotation.get_transform(np_image)
print(transform)
plt.imshow(transform.apply_image(np_image)[...,[2,1,0]])
angle 값이 10일 때(angle=[10, 10])는 다음과 같다.
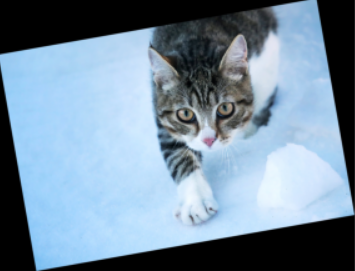
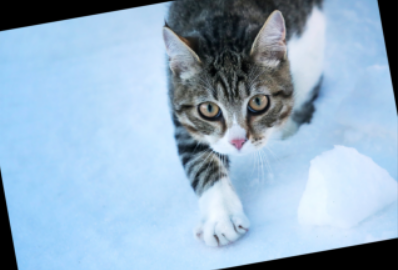
angle 값이 10일 때(angle=[10, 10], expand=False)의 또 다른 예시는 다음과 같다. 이 경우 회전만 시키고, 원래의 이미지 사이즈에 맞게 이미지를 resize하지 않기 때문에, 사진의 일부 영역이 가려져 보이지 않게 된다.
6. Resize Shortest Edge
참고로 랜덤(random) 변형은 아니지만, computer vision task에서 많이 사용되는 augmentation 기법 중 하나로 resize shortest edge가 있다. 이것은 이미지의 가로 혹은 세로 중에서 짧은 변의 길이가 특정한 값이 되도록 이미지를 resize하는 기법이다.
import sys
from PIL import Image


class ResizeTransform(Transform):
    """
    Resize the image to a target size.
    """

    def __init__(self, h, w, new_h, new_w, interp=None):
        """
        Args:
            h, w (int): original image size
            new_h, new_w (int): new image size
            interp: PIL interpolation methods, defaults to bilinear.
        """
        # TODO decide on PIL vs opencv
        super().__init__()
        if interp is None:
            interp = Image.BILINEAR
        self._set_attributes(locals())

    def apply_image(self, img, interp=None):
        assert img.shape[:2] == (self.h, self.w)
        assert len(img.shape) <= 4
        interp_method = interp if interp is not None else self.interp

        if img.dtype == np.uint8:
            if len(img.shape) > 2 and img.shape[2] == 1:
                pil_image = Image.fromarray(img[:, :, 0], mode="L")
            else:
                pil_image = Image.fromarray(img)
            pil_image = pil_image.resize((self.new_w, self.new_h), interp_method)
            ret = np.asarray(pil_image)
            if len(img.shape) > 2 and img.shape[2] == 1:
                ret = np.expand_dims(ret, -1)
        else:
            # PIL only supports uint8
            if any(x < 0 for x in img.strides):
                img = np.ascontiguousarray(img)
            img = torch.from_numpy(img)
            shape = list(img.shape)
            shape_4d = shape[:2] + [1] * (4 - len(shape)) + shape[2:]
            img = img.view(shape_4d).permute(2, 3, 0, 1)  # hw(c) -> nchw
            _PIL_RESIZE_TO_INTERPOLATE_MODE = {
                Image.NEAREST: "nearest",
                Image.BILINEAR: "bilinear",
                Image.BICUBIC: "bicubic",
            }
            mode = _PIL_RESIZE_TO_INTERPOLATE_MODE[interp_method]
            align_corners = None if mode == "nearest" else False
            img = F.interpolate(
                img, (self.new_h, self.new_w), mode=mode, align_corners=align_corners
            )
            shape[:2] = (self.new_h, self.new_w)
            ret = img.permute(2, 3, 0, 1).view(shape).numpy()  # nchw -> hw(c)

        return ret

    def apply_coords(self, coords):
        coords[:, 0] = coords[:, 0] * (self.new_w * 1.0 / self.w)
        coords[:, 1] = coords[:, 1] * (self.new_h * 1.0 / self.h)
        return coords

    def apply_segmentation(self, segmentation):
        segmentation = self.apply_image(segmentation, interp=Image.NEAREST)
        return segmentation

    def inverse(self):
        return ResizeTransform(self.new_h, self.new_w, self.h, self.w, self.interp)


class ResizeShortestEdge():
    """
    Scale the shorter edge to the given size, with a limit of `max_size` on the longer edge.
    If `max_size` is reached, then downscale so that the longer edge does not exceed max_size.
    """

    def __init__(
        self, short_edge_length, max_size=sys.maxsize, sample_style="range", interp=Image.BILINEAR
    ):
        """
        Args:
            short_edge_length (list[int]): If ``sample_style=="range"``,
                a [min, max] interval from which to sample the shortest edge length.
                If ``sample_style=="choice"``, a list of shortest edge lengths to sample from.
            max_size (int): maximum allowed longest edge length.
            sample_style (str): either "range" or "choice".
        """
        super().__init__()
        assert sample_style in ["range", "choice"], sample_style

        self.is_range = sample_style == "range"
        if isinstance(short_edge_length, int):
            short_edge_length = (short_edge_length, short_edge_length)
        if self.is_range:
            assert len(short_edge_length) == 2, (
                "short_edge_length must be two values using 'range' sample style."
                f" Got {short_edge_length}!"
            )
        self.short_edge_length = short_edge_length
        self.max_size = max_size
        self.sample_style = sample_style
        self.interp = interp

    def get_transform(self, image):
        h, w = image.shape[:2]
        if self.is_range:
            size = np.random.randint(self.short_edge_length[0], self.short_edge_length[1] + 1)
        else:
            size = np.random.choice(self.short_edge_length)
        if size == 0:
            return NoOpTransform()

        scale = size * 1.0 / min(h, w)
        if h < w:
            newh, neww = size, scale * w
        else:
            newh, neww = scale * h, size
        if max(newh, neww) > self.max_size:
            scale = self.max_size * 1.0 / max(newh, neww)
            newh = newh * scale
            neww = neww * scale
        neww = int(neww + 0.5)
        newh = int(newh + 0.5)
        return ResizeTransform(h, w, newh, neww, self.interp)
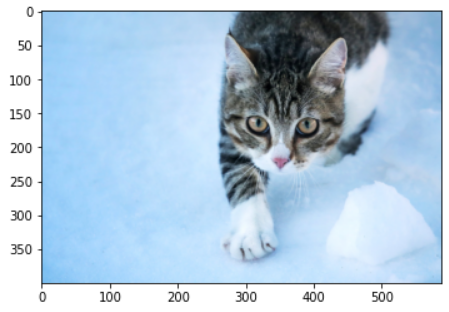
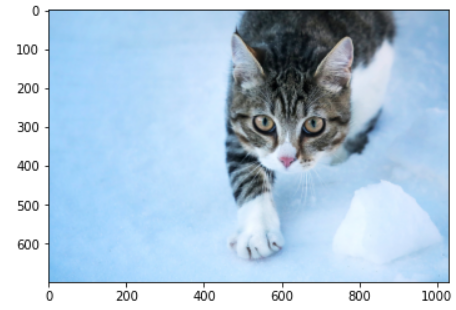
min_size = 400, max_size = 4,000일 때의 예시는 다음과 같다. 짧은 변(세로)의 길이가 400이 된다.
resize_shortest_edge = ResizeShortestEdge(400, 4000)
transform = resize_shortest_edge.get_transform(np_image)
print(transform)
plt.imshow(transform.apply_image(np_image)[...,[2,1,0]])
min_size = 700, max_size = 4,000일 때의 예시는 다음과 같다. 짧은 변(세로)의 길이가 700이 된다.
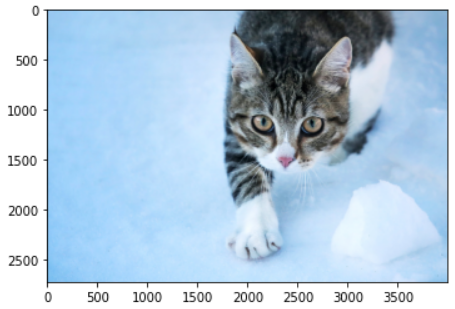
min_size = 3600, max_size = 4,000일 때의 예시는 다음과 같다. 긴 변(가로)의 길이가 최대 4,000이어야 하기 때문에, 짧은 변(세로)의 길이가 2719까지만 증가하고 멈추게 된다.
'기타' 카테고리의 다른 글
| Python 코드를 활용하여 동전 던지기로 주사위 굴리기와 같은 결과 만들기(Rejection Sampling과 확률론) (0) | 2021.08.12 |
|---|---|
| 연구자를 위한, Google Scholar에 회원가입(프로필 등록)하는 방법 (0) | 2021.08.11 |
| TestDome (해외 및 국내 코딩 테스트 사이트) 소개 및 TestDome에서 예제 문제 풀어보기 (0) | 2021.07.28 |
| FiftyOne 라이브러리를 이용해 COCO 2017 validation 데이터셋에서 원하는 개수의 이미지만 가져와 작은 크기의 데이터셋 구축하기 (0) | 2021.07.28 |
| 학교 계정 원드라이브(OneDrive) 저장소에서 남은 용량 확인하는 방법 (0) | 2021.07.27 |
TestDome (해외 및 국내 코딩 테스트 사이트) 소개 및 TestDome에서 예제 문제 풀어보기
TestDome은 코딩 테스트 서비스 회사 중 하나다. 해외 및 국내에서 많은 기업이 TestDome 사이트를 이용해 지원자들을 코딩 테스트를 통해 평가하고 있다.
▶ TestDome 테스트(Test) 사이트: https://www.testdome.com/tests
Tests | TestDome
www.testdome.com
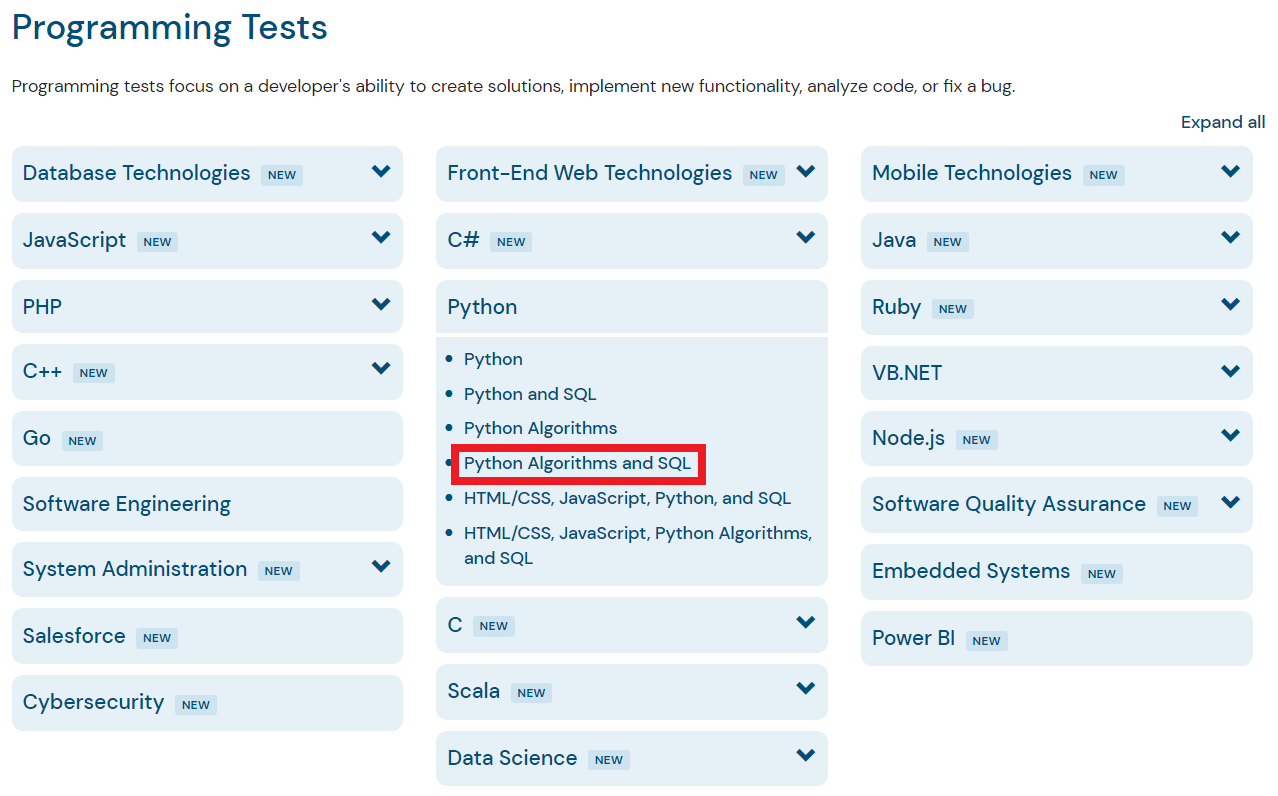
사이트에 접속하면 다음과 같이 다양한 프로그래밍 테스트 유형의 문제들을 확인할 수 있다. 한 번 간단하게 [Python Algorithms and SQL] 페이지로 접속해 보겠다.
자신이 원하는 테스트 유형을 선택한 뒤에, [Take a Practice Test] 버튼을 눌러 연습용 테스트를 진행할 수 있다.

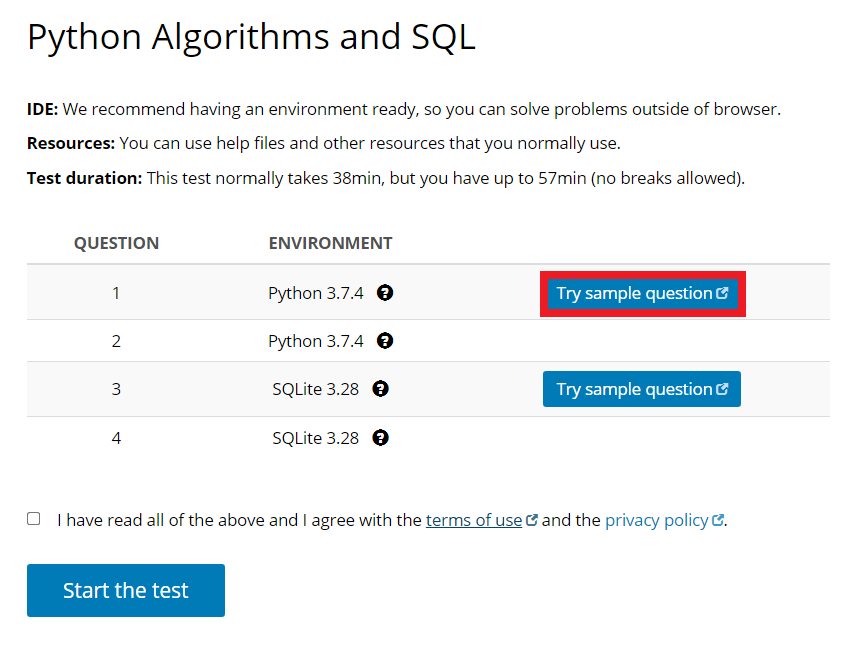
TestDome에서는 기본적으로 인터넷 검색 및 기타 IDE를 사용하는 것을 허용한다. 필자가 지원했던 회사에서도 TestDome 사이트를 이용해 코딩 테스트를 치르도록 했는데, 인터넷 검색을 허용한다고 적혀 있었다. 문제 예시를 확인하기 위해 간단히 [Try sample question] 버튼을 누르면 된다.
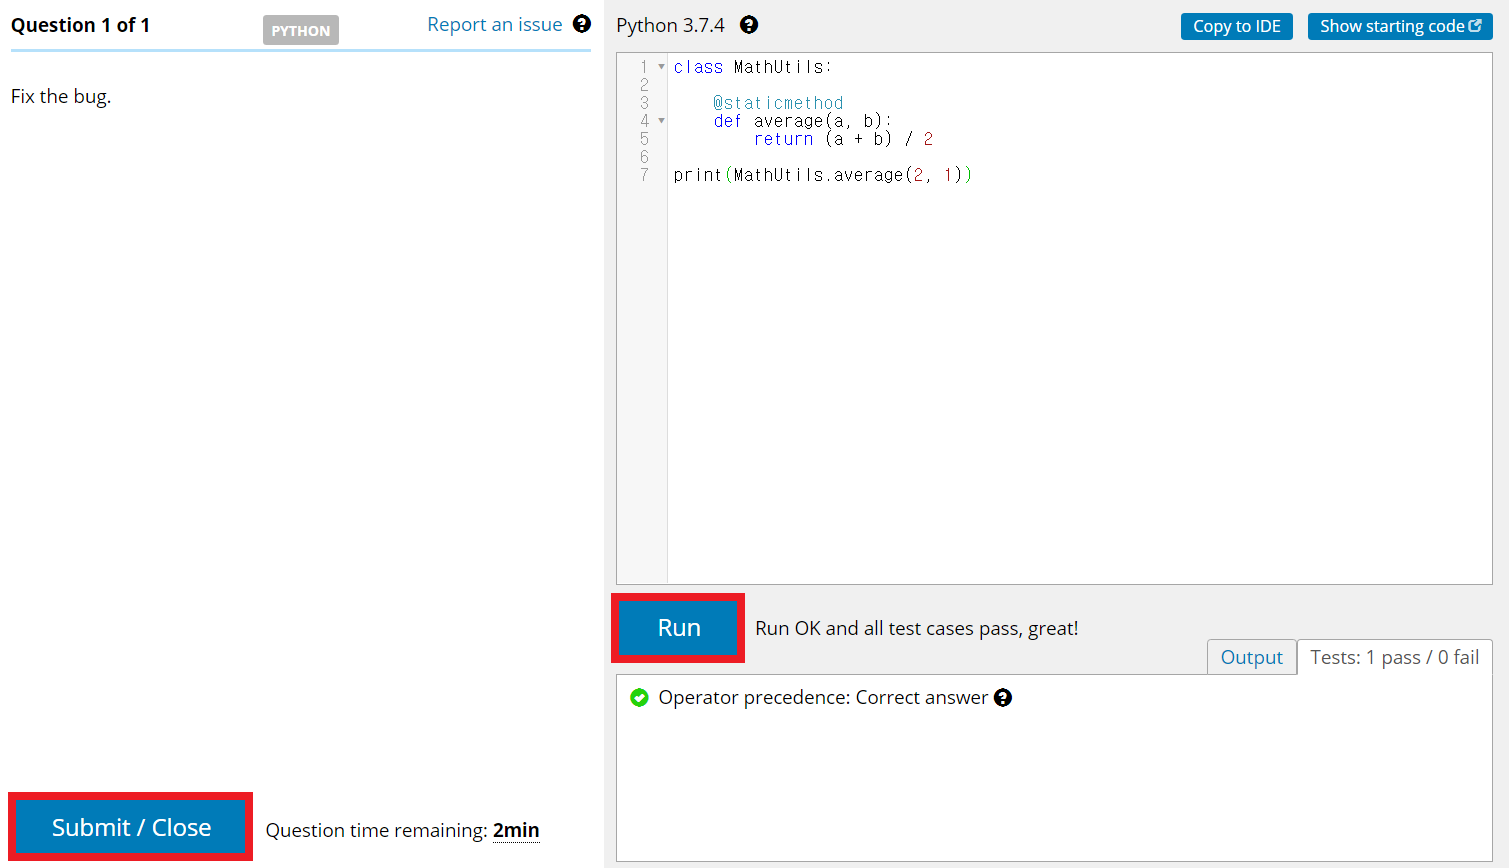
참고로 코드는 코드 입력 창으로 붙여넣기가 가능하다. [Run] 버튼을 눌러 작성한 코드를 실행할 수 있는데, 각 테스트 케이스에 따라서 정답 여부가 출력된다. 또한, 코드 작성이 완료되면 [Submit] 버튼을 눌러 최종 정답(final answer)으로 제출할 수 있다. 만약 시간이 아직 남아 있다면, 마지막에 제출한 정답이 최종 정답이 된다. 참고로, 제한 시간이 얼마 안 남았을 때 스피커를 통해 몇 분 남았다고 안내 메시지가 소리로 출력된다.
아래는 샘플 문제(sample question)로 TestDome이 제공하는 문제 예시다. 문제에서 요구하는 대로 코드를 작성한 뒤에 채점을 받을 수 있다. 제한 시간이 끝나면 알아서 종료된다.
샘플 문제를 풀어 본 뒤에는, 약관에 동의하고 [Start the test] 버튼을 누르면 실제 회사 입사 코딩 테스트를 보는 것처럼 테스트를 볼 수 있다. 자신이 지원하는 직군에 맞는 테스트로 한 번 문제를 풀어 보는 것을 추천한다.

'기타' 카테고리의 다른 글
FiftyOne 라이브러리를 이용해 COCO 2017 validation 데이터셋에서 원하는 개수의 이미지만 가져와 작은 크기의 데이터셋 구축하기
FiftyOne 라이브러리는 COCO 데이터셋을 관리하기에 매우 편리한 라이브러리 중 하나입니다. FiftyOne 라이브러리의 공식 웹 사이트에서 제공하고 있는 COCO 데이터셋 관리 튜토리얼은 다음과 같습니다. 본 포스팅은 아래의 튜토리얼을 참고하여 작성되었습니다.
▶ FiftyOne 공식 웹 사이트: https://voxel51.com/docs/fiftyone/integrations/coco.html
COCO Integration — FiftyOne 0.11.1 documentation
COCO Integration With support from the team behind the COCO dataset, we’ve made it easy to dowload, visualize, and evaluate on the COCO dataset natively in FiftyOne! Note Check out this tutorial to see how you can use FiftyOne to evaluate a model on COCO
voxel51.com
※ FiftyOne 라이브러리 설치 ※
FiftyOne 라이브러리는 다음과 같은 명령어로 설치를 진행할 수 있습니다.
!pip install fiftyone
※ COCO 2017 데이터셋에서 200개의 데이터만 가지고 오기 ※
COCO 2017 validation 데이터셋에서 특정 개수의 이미지만 가지고 오고 싶다면 어떻게 하면 될까요? 예를 들어 200개의 이미지만 가지고 오고 싶다면, 다음과 같이 하면 됩니다.
import fiftyone as fo
import fiftyone.zoo as foz


dataset = foz.load_zoo_dataset(
    "coco-2017",
    split="validation",
    max_samples=200,
    shuffle=True,
)
그러면 자동으로 서버에서 annotations 데이터와 이미지 200개를 다운로드하여 가져오게 됩니다. 참고로 COCO 2017의 validation 데이터셋은 총 5,000개의 이미지로 구성되어 있기 때문에, 만약에 max_samples의 값으로 5,000 이상의 값을 넣으면 전체 이미지 개수인 5,000장까지만 다운로드가 진행됩니다.
※ dataset 객체를 다시 파일로 저장하기 ※
그렇다면 fiftyone.core.dataset 객체에 포함된 이미지를 어떻게 다시 폴더로 내보내기할 수 있을까요? 한 번 [링크] dataset 객체 설명 페이지에 접속해 봅시다. 페이지에 접속하여 export() 함수에 대한 설명을 확인할 수 있습니다. 설명을 확인해 보면 export_dir에 이미지 파일들이 저장되고, labels_path에 레이블에 대한 정보가 담기게 됩니다.
dataset.export(
    export_dir='./my_coco_val2017_200/',
    dataset_type=fo.types.COCODetectionDataset,
    label_field="ground_truth",
    labels_path="./annotations/instances.json",
)
실제로 위 코드를 실행하면 다음과 같은 형태로 이미지와 레이블 정보가 기록됩니다.

이러한 폴더를 압축하여 내보내고 싶다면 다음과 같이 할 수 있습니다.
!zip -r my_coco_val2017_200.zip ./my_coco_val2017_200/*
※ (참고) COCO 형식의 폴더로부터 데이터셋 불러오기 ※
COCO 형식의 데이터셋 폴더로부터 dataset 객체를 불러오는 방법을 확인해 봅시다. 이 또한 굉장히 간단합니다. 자세한 내용은 [링크] FiftyOne 디스크로부터 데이터셋 불러오기 튜토리얼 페이지에서 확인할 수 있습니다.
# 이미지를 포함하고 있는 폴더 경로
data_path = "/path/to/images"

# COCO 레이블 JSON 파일이 포함된 경로
labels_path = "/path/to/coco-labels.json"

# 데이터셋 불러오기
dataset = fo.Dataset.from_dir(
    dataset_type=fo.types.COCODetectionDataset,
    data_path=data_path,
    labels_path=labels_path,
)'기타' 카테고리의 다른 글
| fvcore를 이용해 NumPy 형식의 이미지를 Random Transformation하는 방법 (RandomRotation, RandomFlip, RandomContrast, RandomBrightness, RandomSaturation 등) (0) | 2021.07.29 |
|---|---|
| TestDome (해외 및 국내 코딩 테스트 사이트) 소개 및 TestDome에서 예제 문제 풀어보기 (0) | 2021.07.28 |
| 학교 계정 원드라이브(OneDrive) 저장소에서 남은 용량 확인하는 방법 (0) | 2021.07.27 |
| COCO 데이터셋 설명 및 다운로드 방법 정리 (1) | 2021.07.27 |
| 한국투자증권을 이용한 카카오 뱅크 공모주 청약 방법 (2021년 7월 27일까지) (0) | 2021.07.26 |
학교 계정 원드라이브(OneDrive) 저장소에서 남은 용량 확인하는 방법
원드라이브(OneDrive)를 사용하고 있는 회사나 학교가 많다. 필자 또한 학교에서 메일 서비스와 저장소 서비스를 Microsoft의 OneDrive를 통해 제공하고 있다. 필자를 포함해 많은 학교에서는 기본적으로 1TB 정도의 용량을 제공하는 경우가 많다. 이때 할당된 용량 중에서 얼마나 남았는지 궁금하다면, 다음과 같이 확인할 수 있다.
[오른쪽 위 톱니바퀴(설정) 버튼] - [OneDrive 설정] - [기타 설정] - [저장소 메트릭]에 들어간다.
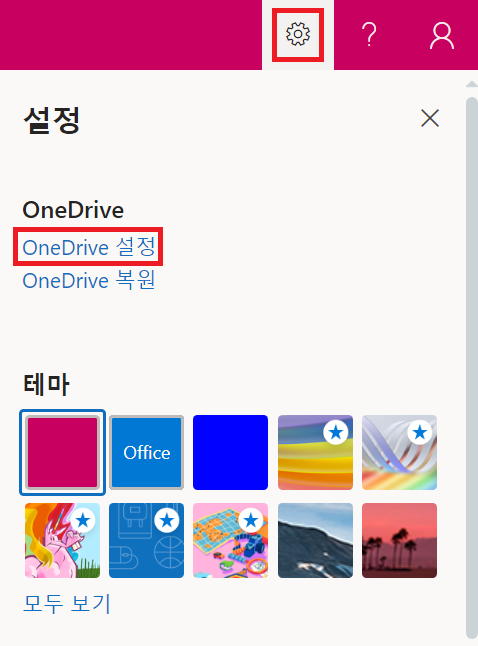

그러면 다음과 같이 저장소의 남은 공간이 출력된다. 필자의 경우 1TB 중에서 627.25GB의 공간이 남은 상태다.

'기타' 카테고리의 다른 글
| TestDome (해외 및 국내 코딩 테스트 사이트) 소개 및 TestDome에서 예제 문제 풀어보기 (0) | 2021.07.28 |
|---|---|
| FiftyOne 라이브러리를 이용해 COCO 2017 validation 데이터셋에서 원하는 개수의 이미지만 가져와 작은 크기의 데이터셋 구축하기 (0) | 2021.07.28 |
| COCO 데이터셋 설명 및 다운로드 방법 정리 (1) | 2021.07.27 |
| 한국투자증권을 이용한 카카오 뱅크 공모주 청약 방법 (2021년 7월 27일까지) (0) | 2021.07.26 |
| 한국투자증권 모바일 앱(App)을 이용하여 1시간 만에 주식(증권) 계좌 개설하는 방법 (비대면 온라인 계좌 개설) (0) | 2021.07.26 |
COCO 데이터셋 설명 및 다운로드 방법 정리
COCO 데이터셋은 객체 탐지 (object detection), 세그먼테이션 (segmentation), 키포인트 탐지 (keypoint detection) 등의 컴퓨터 비전(computer vision) 분야의 task를 목적으로 만들어진 데이터셋입니다. 실제로 object detection 관련 논문을 읽어 보면, 논문에서 성능 평가 목적으로 많이 사용되는 데이터셋 중에서 COCO 2017을 확인할 수 있습니다. 더불어 많은 object detection 라이브러리는 이러한 COCO 데이터셋으로 사전 학습된(pre-trained) 모델을 제공하고 있습니다. COCO 2017 데이터셋은 다음과 같이 구성되어 있습니다.
▶ 학습(training) 데이터셋: 118,000장의 이미지
▶ 검증(validation) 데이터셋: 5,000장의 이미지
▶ 테스트(test) 데이터셋: 41,000장의 이미지
COCO 데이터셋은 다음의 경로에서 자세한 내용을 확인할 수 있습니다.
▶ COCO 데이터셋 공식 웹 사이트: https://cocodataset.org/
COCO - Common Objects in Context
cocodataset.org
다음과 같이 [데이터셋(dataset)] 페이지로 이동한 뒤에, 데이터셋을 다운로드할 수 있습니다. 저는 간단히 사전 학습된 모델에 대한 평가(evaluation)만 진행할 것이기 때문에, 2017 validation 데이터셋과 Train/Val annotations 파일을 다운로드하였습니다.
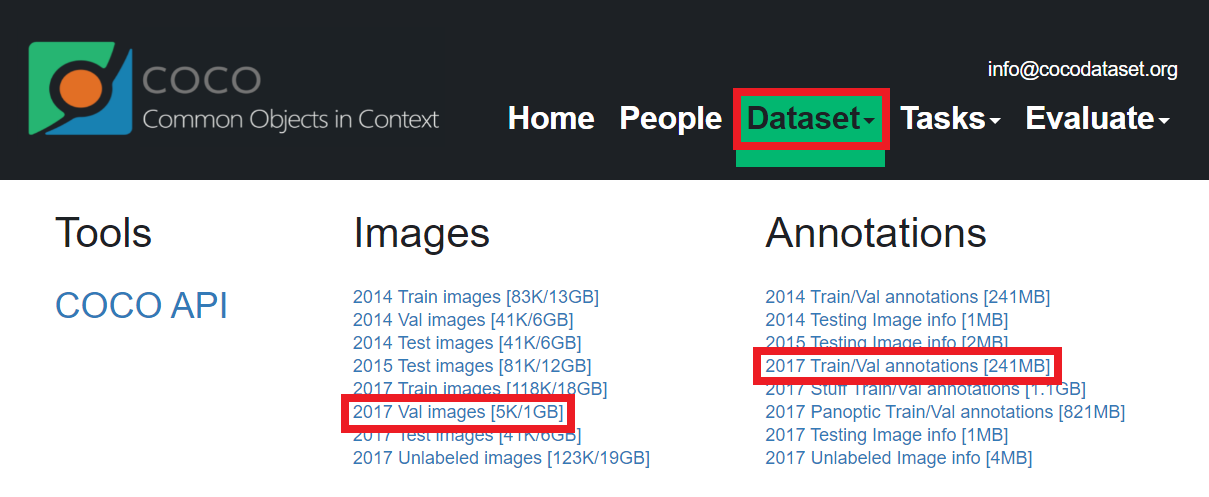
해당 파일을 다운로드해 보면, 2017 validation 데이터셋에는 다음과 같이 5,000장의 이미지가 존재하는 것을 확인할 수 있습니다. 전체 용량은 약 800MB 정도입니다.

또한 annotations 파일을 다운로드하면, 다음과 같이 captions_val2017.json 파일이 존재합니다. 이 파일은 이미지에 대한 기본적인 설명이 포함되어 있습니다. 그리고 instances_val2017.json 파일에는 각 이미지 파일 내부에 어떠한 객체(object)가 존재하는지, 바운딩 박스(bounding box)와 함께 그 클래스(class) 정보가 함께 주어집니다.
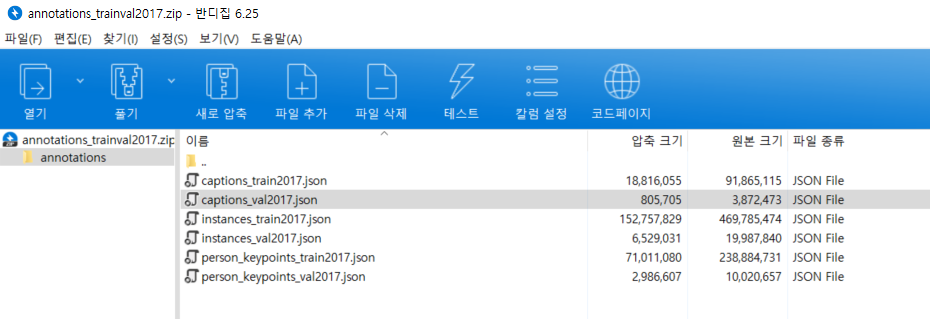
따라서 instances.json 파일이 일반적인 세그먼테이션(segmentation), 객체 탐지(object Detection) 분야에서 가장 중요한 annotation 파일입니다. 실제로 내용을 열어 보시면, 다음과 같이 각 이미지(image)에 대하여 파일명이 무엇인지, 이미지의 높이와 너비는 어느 정도인지에 대한 이미지 파일 관련 정보가 나와 있습니다.
"images": [
    {
        "license": 4,
        "file_name": "000000397133.jpg",
        "coco_url": "http://images.cocodataset.org/val2017/000000397133.jpg",
        "height": 427,
        "width": 640,
        "date_captured": "2013-11-14 17:02:52",
        "flickr_url": "http://farm7.staticflickr.com/6116/6255196340_da26cf2c9e_z.jpg",
        "id": 397133
    },
    {
        "license": 1,
        "file_name": "000000037777.jpg",
        "coco_url": "http://images.cocodataset.org/val2017/000000037777.jpg",
        "height": 230,
        "width": 352,
        "date_captured": "2013-11-14 20:55:31",
        "flickr_url": "http://farm9.staticflickr.com/8429/7839199426_f6d48aa585_z.jpg",
        "id": 37777
     },
     ...
],
이후에 annotations 정보에 대한 상세 내용을 확인할 수 있습니다. 여기에서는 각 사물(object)에 대하여 segmentation 정보가 들어가 있습니다. 해당 사물이 이미지 내 어떤 위치에 있는지, 구체적인 바운딩 박스(bounding box)에 대한 정보와 함께 기록되어 있습니다.
"annotations": [
    {
        "segmentation": [
            [
                510.66,
                423.01,
                511.72,
                420.03,
                510.45,
                416.0,
                510.34,
                413.02,
                ...
            ]
        ],
        "area": 702.1057499999998,
        "iscrowd": 0,
        "image_id": 289343,
        "bbox": [
            473.07,
            395.93,
            38.65,
            28.67
        ],
        "category_id": 18,
        "id": 1768
    },
    {
        "segmentation": [
            [
                289.74,
                443.39,
                302.29,
                445.32,
                308.09,
                427.94,
                310.02,
                416.35,
                ...
            ]
        ],
        "area": 27718.476299999995,
        "iscrowd": 0,
        "image_id": 61471,
        "bbox": [
            272.1,
            200.23,
            151.97,
            279.77
        ],
        "category_id": 18,
        "id": 1773
    },
    ...
]'기타' 카테고리의 다른 글
| FiftyOne 라이브러리를 이용해 COCO 2017 validation 데이터셋에서 원하는 개수의 이미지만 가져와 작은 크기의 데이터셋 구축하기 (0) | 2021.07.28 |
|---|---|
| 학교 계정 원드라이브(OneDrive) 저장소에서 남은 용량 확인하는 방법 (0) | 2021.07.27 |
| 한국투자증권을 이용한 카카오 뱅크 공모주 청약 방법 (2021년 7월 27일까지) (0) | 2021.07.26 |
| 한국투자증권 모바일 앱(App)을 이용하여 1시간 만에 주식(증권) 계좌 개설하는 방법 (비대면 온라인 계좌 개설) (0) | 2021.07.26 |
| 공인인증서(공동인증서) 파일로 내보내기 한 이후에 다른 컴퓨터에서 불러와 사용하는 방법 (0) | 2021.07.25 |
한국투자증권을 이용한 카카오 뱅크 공모주 청약 방법 (2021년 7월 27일까지)
카카오 뱅크 공모주 청약 일정이 나왔습니다. 공모가는 39,000원이고, 청약일은 7월 26일(월요일)과 7월 27일(화요일)입니다. 또한, 상장일은 8월 6일(금요일)이라고 합니다. 투자자 입장에서 공모주는 상장 당일 매도함으로써 수익실현을 하기 위해 구매하는 경우가 많습니다. 또한 기본적으로 카카오 뱅크 공모주 청약은 중복 청약이 안 되는 것으로 알려져 있습니다. 그래서 KB증권, 한국투자증권, 하나금융투자, 현대차증권 중에서 하나를 선택해 청약을 진행하면 됩니다.
이 중에서 많은 공모 청약 물량을 갖고 있는 증권사 중 하나인 한국투자증권을 이용해 청약을 진행하는 방법을 소개합니다. 한국투자증권을 이용해 공모주 청약을 진행하려면, 먼저 한국투자증권 주식 계좌가 있어야 합니다. 혹시나 한국투자증권 주식 계좌가 없으신 분들을 위해, 비대면(온라인)으로 계좌를 만드는 방법을 소개하자면 다음과 같습니다.
▶ 한국투자증권 모바일 앱(App)을 이용하여 주식(증권) 계좌 개설하는 방법
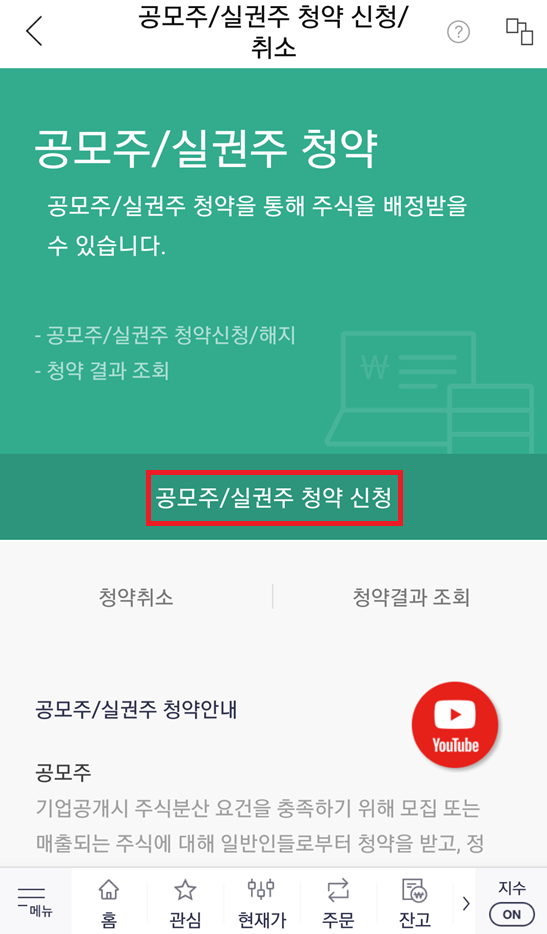
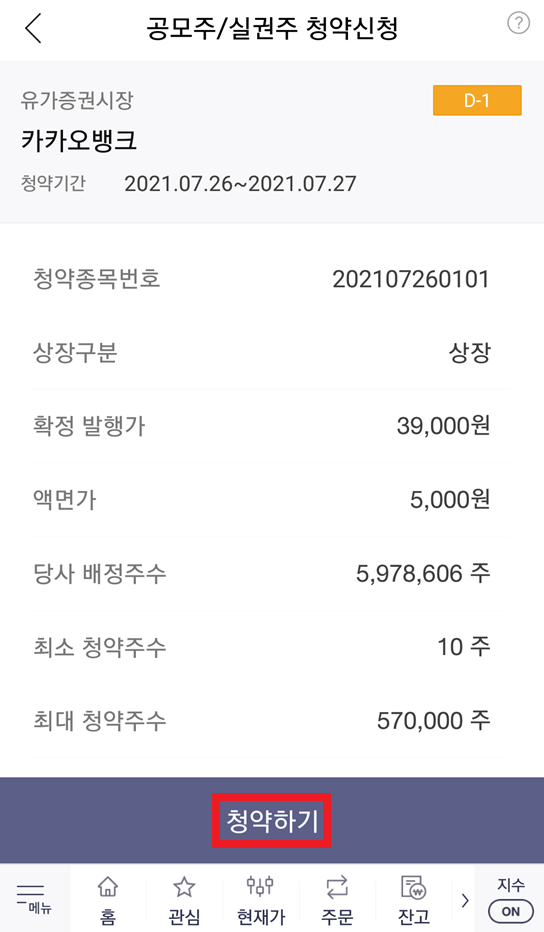
이제 청약을 진행해 봅시다. 한국투자증권 모바일 앱을 실행하여 [계좌/서비스] - [청약] - [공모주/실권주 청약 신청/취소] 페이지로 이동합니다. 이후에 [청약 신청] 버튼을 눌러 청약 가능 종목을 확인할 수 있는데, 카카오뱅크가 나오는 것을 알 수 있습니다. 따라서 카카오뱅크를 선택하여 청약 신청을 진행하면 됩니다.


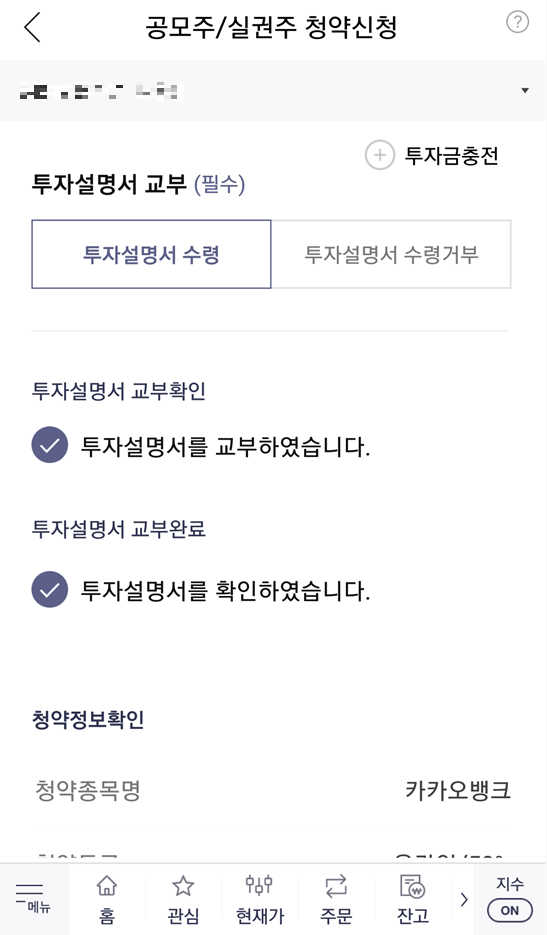
참고로 청약 신청 전에 미리 [주식 계좌]에 돈을 입금해 놓으면 됩니다. 필자의 경우 600만 원을 주식 계좌에 입금해 놓았습니다. 청약 신청을 위해 [투자설명서]를 확인한 뒤에, 자신이 구매하고자 하는 청약 수량을 입력하면 됩니다. 필자의 경우 300주를 입력했고, 이에 따른 청약 증거금은 5,850,000원입니다. 필자의 주식 계좌에 있는 돈이 약 600만 원이므로, 청약 신청이 가능합니다.
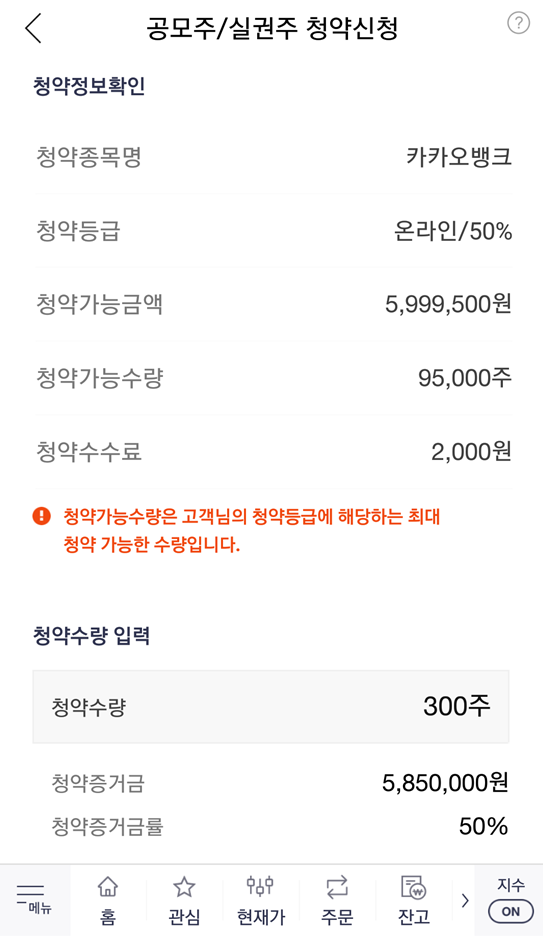
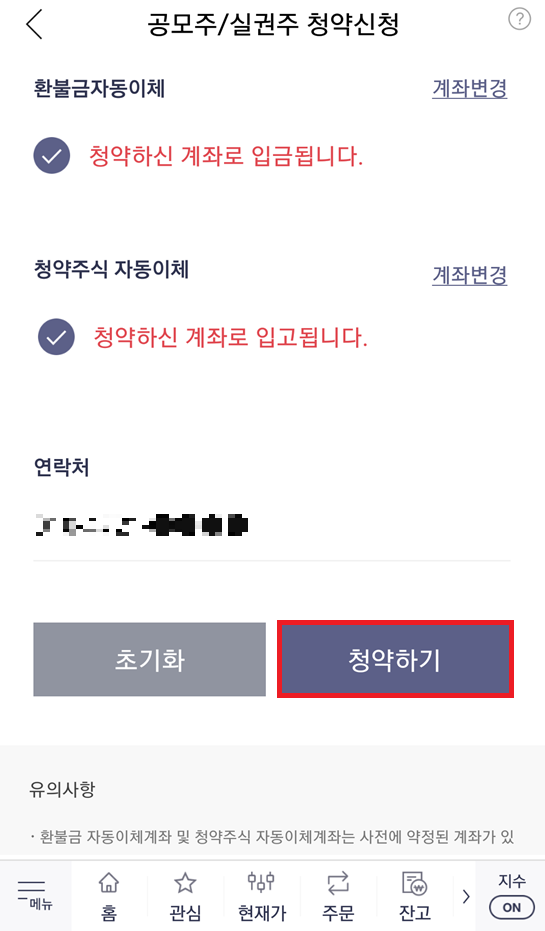
결과적으로 다음과 같이 [청약하기] 버튼을 눌러 공모주 청약을 신청 완료할 수 있습니다. 참고로 저녁 시간에는 신청이 불가능할 수 있습니다.
'기타' 카테고리의 다른 글
| 학교 계정 원드라이브(OneDrive) 저장소에서 남은 용량 확인하는 방법 (0) | 2021.07.27 |
|---|---|
| COCO 데이터셋 설명 및 다운로드 방법 정리 (1) | 2021.07.27 |
| 한국투자증권 모바일 앱(App)을 이용하여 1시간 만에 주식(증권) 계좌 개설하는 방법 (비대면 온라인 계좌 개설) (0) | 2021.07.26 |
| 공인인증서(공동인증서) 파일로 내보내기 한 이후에 다른 컴퓨터에서 불러와 사용하는 방법 (0) | 2021.07.25 |
| 우체국 인터넷뱅킹 공동인증서(공인인증서) 유효기간 갱신하는 방법 (0) | 2021.07.25 |
한국투자증권 모바일 앱(App)을 이용하여 1시간 만에 주식(증권) 계좌 개설하는 방법 (비대면 온라인 계좌 개설)
필자의 경우 다양한 증권사의 HTS나 앱(app)을 이용하여 주식를 거래를 진행하고 있는데, 이번에 한국투자증권에서도 주식 계좌를 개설했습니다. 계좌를 개설하는 방법은 다른 증권사와 유사합니다. 한국투자증권도 비대면(온라인) 증권 계좌 개설 서비스를 제공하며, 신분증 및 계좌 인증을 통해 빠르고 간단하게 증권 계좌를 개설할 수 있습니다.
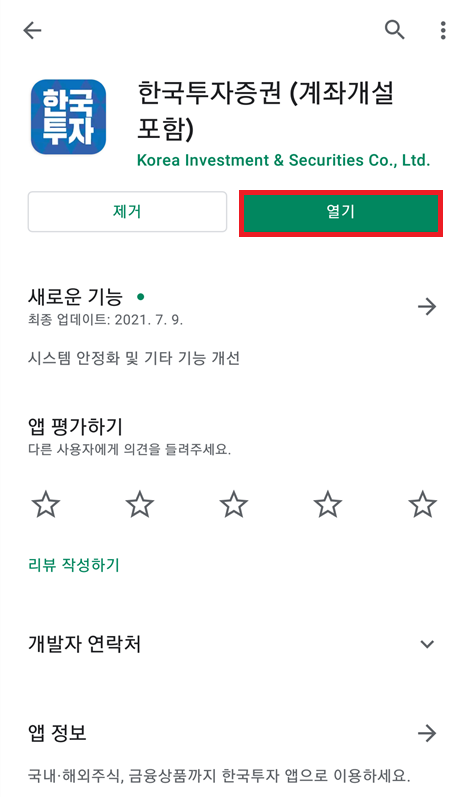
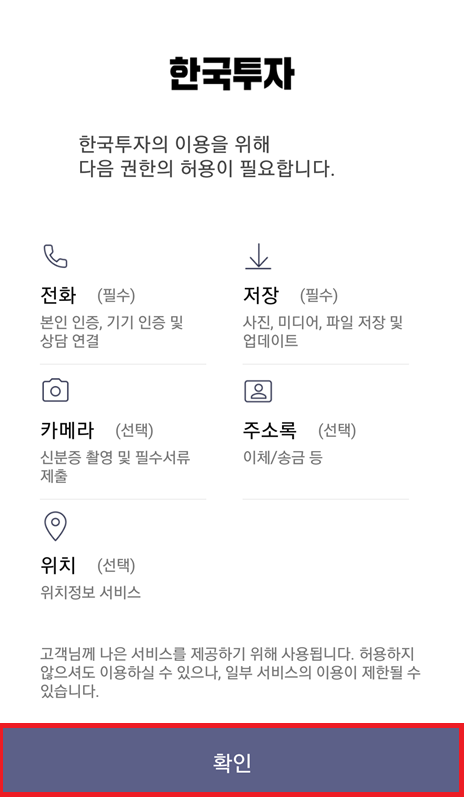
가장 먼저 한국투자증권 앱을 다운로드 ㄷ합니다. 플레이스토어에 [한국투자증권]을 검색하여, 해당 앱을 설치하면 됩니다. 앱을 설치하여 [열기] 해주면, 가장 먼저 다양한 권한을 허용해 달라는 안내 메시지가 나옵니다. 앱을 원활히 사용하기 위해서는 권한 [허용]을 진행하면 됩니다.
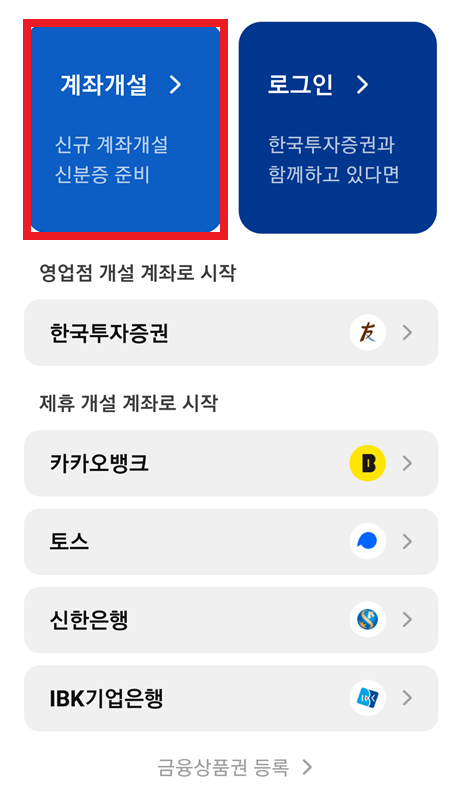
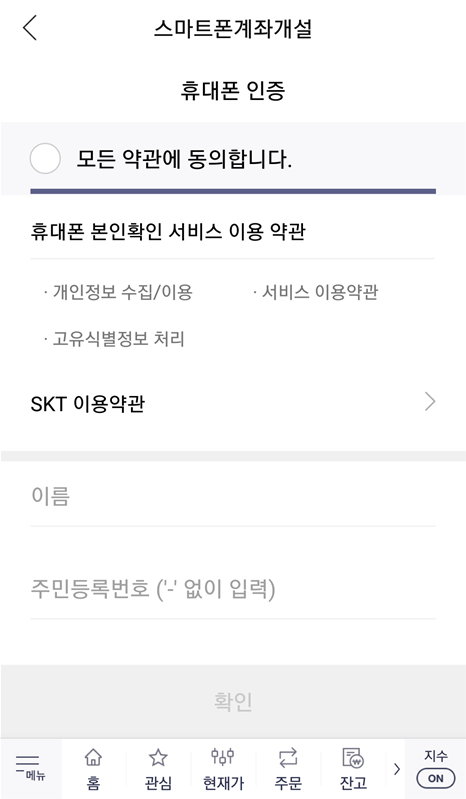
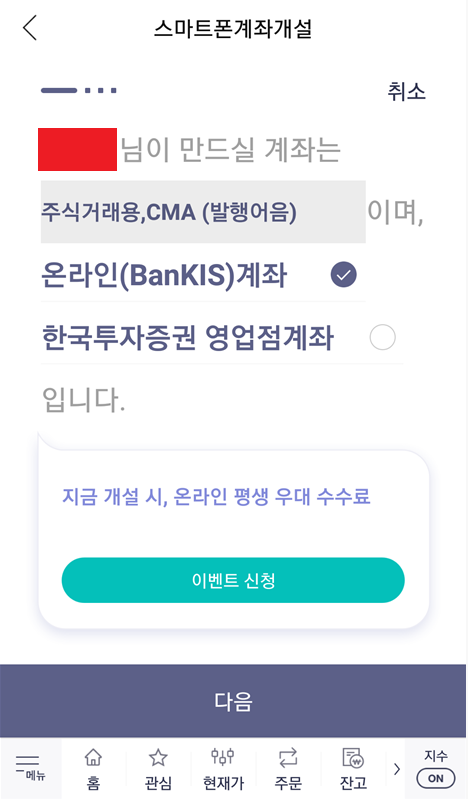
이후에 아직 계좌가 없는 사람이라면 [계좌개설] 버튼을 눌러 새롭게 계좌를 만들면 됩니다. 일반적으로 많이 선택하는 옵션은 [국내 주식계좌 + CMA]로, 주식 계좌를 만든 후에는 자유롭게 국내 주식을 사고팔 수 있습니다. 계좌를 개설하기 위해서는 가장 먼저 휴대폰 인증을 통해 실명 확인을 진행합니다. 휴대폰 번호를 입력하고, 인증번호를 입력하면 됩니다.

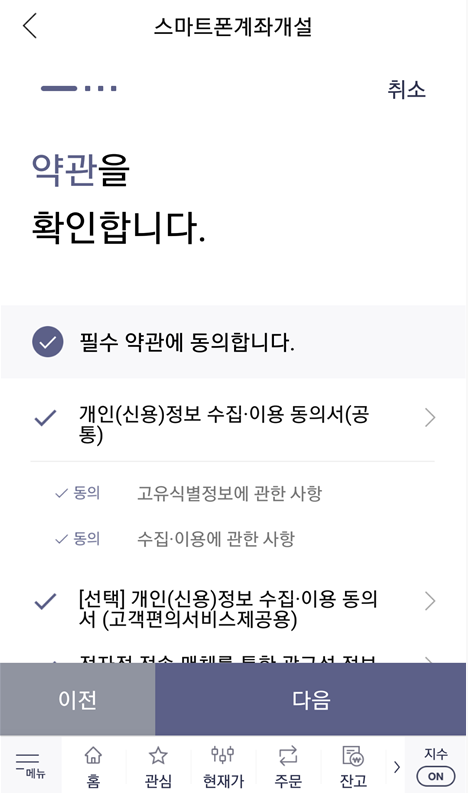
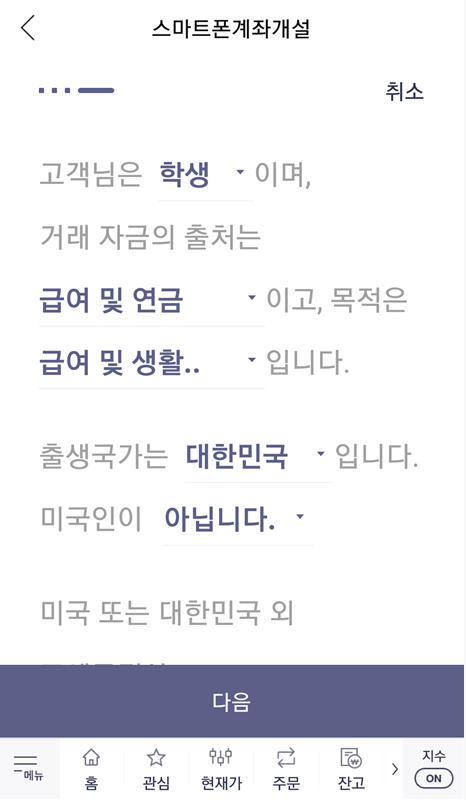
이후에 다음과 같이 계좌 개설에 동의하면 됩니다. 참고로 온라인 평생 우대 수수료, KOSPI 주식 1주 증정 이벤트가 진행 중인데요. 이때 마케팅 수신에 동의해야 주식 1주를 준다고 합니다. 그래서 필자의 경우 마케팅 문자 수신에 동의하고, 이벤트에 참여했습니다. 운 좋으면 삼성전자처럼 비싼 주식을 받을 수도 있을 테니까요.
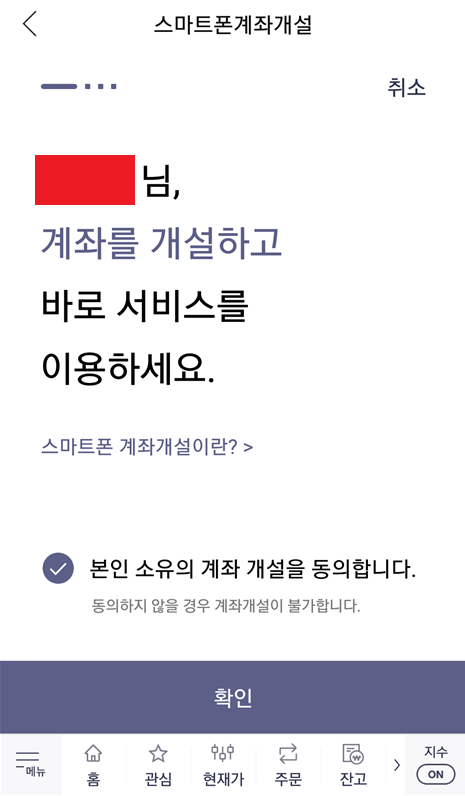
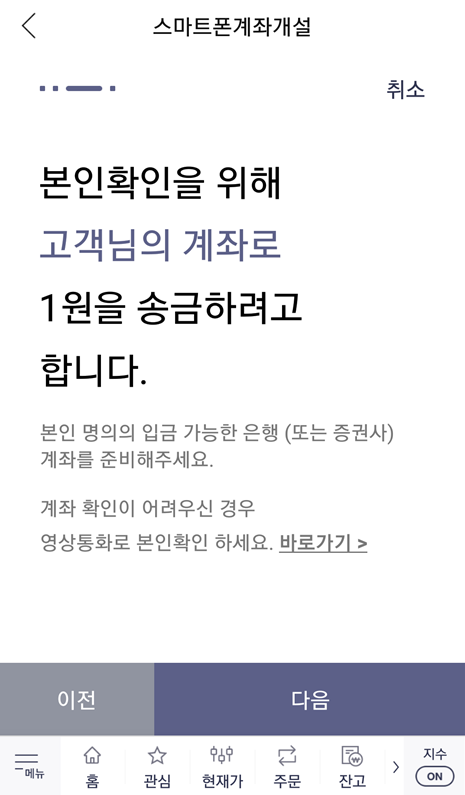
이제 본격적으로 계좌를 개설하기 위해 본인 인증을 진행합니다. [신분증 인증]과 [계좌 인증]인데요. 신분증을 스마트 폰으로 촬영하여 인증하면 되고, 계좌 인증 또한 본인 소유의 계좌로 1원을 송금받아 인증번호를 입력하는 방식으로 인증을 진행할 수 있습니다.

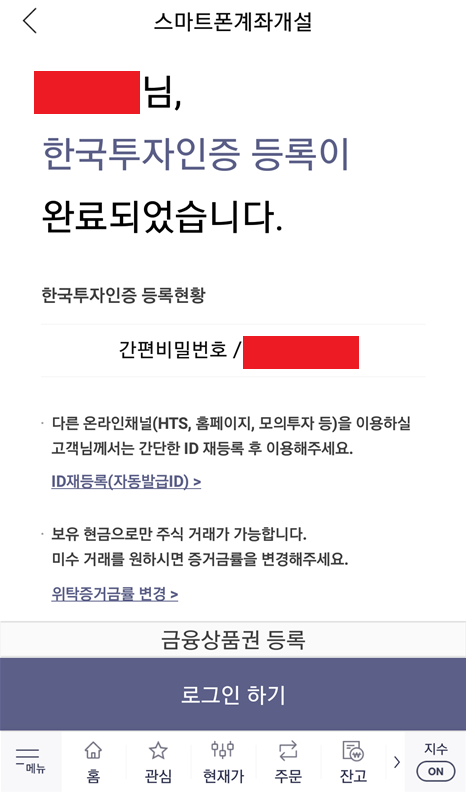
결과적으로 계좌 개설이 완료되었고, 인증 수단을 등록하면 됩니다. 일반적으로 많이 사용되는 것으로는 [간편 비밀번호]가 있습니다. 필자 또한 간편 비밀번호를 인증 수단으로 등록했고, 결과적으로 생성된 주식 계좌 번호를 확인할 수 있었습니다.


결과적으로 필자는 30분 내외의 시간으로, 순식간에 주식 계좌가 생성되었습니다. 이제 간편 비밀번호를 입력해 로그인을 진행하면 됩니다. 필자의 경우 주식 추첨 이벤트에 참여했기 때문에, 다음과 같이 추첨을 통해 주식을 받을 수 있었습니다. 필자가 받은 주식은 메리츠증권 주식입니다.

결과적으로 계좌가 개설되고 난 뒤에는 메인 화면으로 들어간 뒤에, 다음과 같이 [계좌번호]를 확인하고, 해당 계좌번호로 주식 투자를 위한 돈을 입금하면 됩니다. 그러면 [출금 가능금액(예수금)]에 입금된 금액이 출력되는 것을 확인할 수 있습니다. 이렇게 입금된 금액으로 주식 투자를 진행할 수 있습니다.

'기타' 카테고리의 다른 글
| COCO 데이터셋 설명 및 다운로드 방법 정리 (1) | 2021.07.27 |
|---|---|
| 한국투자증권을 이용한 카카오 뱅크 공모주 청약 방법 (2021년 7월 27일까지) (0) | 2021.07.26 |
| 공인인증서(공동인증서) 파일로 내보내기 한 이후에 다른 컴퓨터에서 불러와 사용하는 방법 (0) | 2021.07.25 |
| 우체국 인터넷뱅킹 공동인증서(공인인증서) 유효기간 갱신하는 방법 (0) | 2021.07.25 |
| 공인인증서(공동인증서) 정보(내용) 보기, 암호 변경, 내보내기, 복사 등 방법 소개 (0) | 2021.07.25 |
